Showing posts with label Easy. Show all posts

Monday, January 31, 2011

Crockpot Roast with Potatoes

Last year for Mother's Day my sister was asked to speak in church on what she had learned from our mother.  My sister is a wonderful writer and has a real talent for putting her thoughts into words.  I have always admired this about her.  Anyway, the way she wrote the talk was to talk about how my mother did not necessarily preach to us, but through everyday things she taught us about life and about the importance of faith.  One of those everyday things she used as an example is making a roast.  The first step to a good roast is to heat a skillet as hot as possible and brown the roast on all sides until it is ALMOST burned.  You don't have to do it, but the roast will taste so much better if you do.  She compared this to life.  How often we have to be "burned" to learn the lessons we need to learn and to have the greatest "flavor" and wisdom.  Ever since my mother told me about the talk I can not cook a roast without being reminded of this great lesson in life.  So I am passing it on to you.

Crockpot Roast with Potatoes (printer friendly)
3-4 lb roast
1 onion sliced
 salt & pepper to taste
1/4 tsp garlic powder
1 tsp dried thyme
1/2 C beef broth
4 med-large potatoes, cut into large pieces

1. Heat a large skillet over high heat.  Using tongs brown the roast on all sides until dark golden brown (almost burnt)
Looks good already doesn't it.

Even better

2. Slice the onion.  Place 1/2 the slices on the bottom of your crockpot.


3.  Add the seared roast and sprinkle with seasonings.

4. Add potatoes and remaining onions and pour over the broth.

 
5. Cover the crockpot and cook on low 6-8 hours or high 3-4.
6. Next remove the roast from the crockpot (leave the potatoes in to stay warm until you are ready to serve them)  to a plate and pour some of the remaining sauce over the roast and allow to sit for at least 10-15 minutes.  I always worried about this because I HATE cold food, but it really makes a difference.  The roast has a chance to cool enough to hold the moisture in, instead of it all escaping as steam when you cut it.  When you serve it, pour some more of the remaining broth over it and enjoy!

Monday, January 24, 2011

Tuna Patties

I made these several months ago and our whole family loved them.  They are really simple, and a great pantry food.  For GF bread crumbs I strongly recommend processing Rice Chex.  They are relatively cheap and don't have much flavor so just the flavor of the food comes through.

Tuna Patties (printer friendly)
3 (6 oz) cans of tuna, drained & flaked* 
3 eggs
1 1/2 tsp mustard

3 T onion, minced
1 clove of garlic, minced
1 tsp pepper
1/8 tsp dill
3/4 C bread crumbs
3 T veg oil

1. In a medium bowl combine the tuna, eggs, mustardm onion, garlic, pepper, and dill.


Mix until combined.  Then add the bread crumbs.


Mix with your hands until the mixture is the consistency of cookie dough.

2. Shape into 6 patties.
3. Heat a large skillet over medium heat.  Add the oil and swirl around.  Add the patties.  Cook on both sides until lightly brown.
4. Serve as a a sandwich with pickles, mayo, lettuce, etc.  Or just eat plain.  We had ours with sweet potato fries.  YUM!

Monday, January 17, 2011

Snow Cone Syrup


Last month I taught preschool as a part of a preschool with a group of mom's.  Our topic was snow and for our treat we had snowcones.  I got a snowcone maker a few years ago and have had a lot of fun with it.  But this was my first attempt at making my own syrup.  I made the syrup the way I make my maple syrup and it turned out too thick.  That said it was delicious.  Here is the recipe with a thinner syrup.

Snow Cones (printer friendly)
2 C water
2 C sugar
Candy flavoring

1. In a saucepan combine the water and sugar.  Bring to a boil and allow to boil for 1 minute.  Remove from stove.


You can flavor the whole batch or separate into different bowls for flavoring.  Add about 1/8 tsp flavoring to each bowl.  Taste and add more flavoring as needed.  Color with food coloring if desired
I made, pina colada, lemon, and raspberry.

Monday, November 15, 2010

Chocolate Carmeled Cookies


I can not take credit for this recipe, my 7 year old son dreamed this up with his friend the other day and I came into the kitchen in the middle of them making it.  I have to say, they came up with a delicious recipe.  Basically, it is a twist on Rice Krispie treats.  The name is also a result of my son as he named them.

The Concoction (printer friendly)
4 C miniature marshmallows
1 C chocolate chips
10 caramels, unwrapped & quartered
1/2 C coconut
2 T butter
5 C corn or rice check
1/3 C whole almonds

1. In a large microwave bowl combine the marshmallows, chocolate chips, caramels, coconut, and butter.


Microwave for about 2 minutes.  Keep an eye on it so it doesn't go over the bowl.


2. Meanwhile, chop the almonds.
3. When the marshmallow mixture is done, stir it and add the Chex.  After it is mixed well, sprinkle with chopped almonds and stir again.
4. Place spoonfuls on wax paper and allow them to cool (if you can wait that long).  Makes about 2 doz.

Sunday, November 7, 2010

Johnnycakes


For our kids birthdays we always get them a book.  This year for my son, who is just starting chapter books, I found these Magic Tree House-like books called The Enchanted Tunnel series.  It is an LDS (Mormon) series and the first book finds the brother and sister arriving on a pioneer trek.  My son has LOVED this book.  For him, one of the best parts is a recipe for "Johnnycakes."  Pioneers often cooked these in the morning and then they would wrap them up in a handkerchief and put them in their pockets where they would stay warm.  While not especially hygienic, they were practical for "fast food" on the long walk West.  Since my son started the book the number of times he asked for me to make these is incalculable.  Finally, I relented, and it was one of the best decisions I made.

Basically, they are a cross between a Southern cornbread and a pancake.  The first time we ate them we treated them like a pancake with butter and syrup.  This time thought I thought we would branch out and offer pancake toppings and taco toppings, kind of a Navajo Taco without fry bread.  Both ways are delicious. I then sent them as the bread for a sandwich the next day.  I also think they would be great served plain, perhaps as a side in a meal. 

Johnnycakes (printer friendly)
1 1/4 C flour mix
3/4 C cornmeal
1/2 tsp salt
2 tsp baking powder
1/2 t xanthan gum
1 egg beaten
1 C milk (whatever kind you have)
1/4 C melted butter (or oil)

1. In a medium mixing bowl, combine the flour, cornmeal, salt, baking powder, and xanthan gum.  In a separate bowl combine the egg, milk and melted butter.  Add the egg mixture to the dry mixture and mix just until combined.
2.  Cook one of the following ways:
--Pour into a greased 9x13 pan and bake on 400-degrees for 30 minutes
--Heat a greased skillet (or griddle) on medium-high heat and pour 1/4 C batter for each "cake."    Turn when the top looks bubbly.

Here are photos of two of our favorite ways to eat them.
 Main Course

Dessert

Monday, October 25, 2010

Choose Your Own Lettuce Wraps

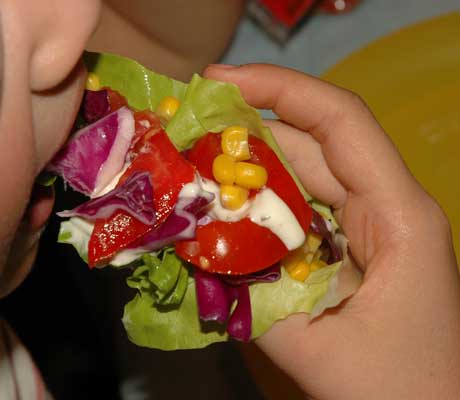
A while ago I was planning on making chicken tacos and got them almost made only to realize I didn't have tortillas or chips.  Needless to say, I was annoyed.  After searching the fridge, freezer and cupboards I found some Romain lettuce and decided to just use the lettuce as the "tortilla."  They were wonderful, and I felt so healthy.  That said, I have found that butter lettuce works a lot better, but Romain works in a pinch.  The other night I decide to do a "clean out the fridge" and do lettuce wraps.  It turned out wonderfully.  I basically took anything and everything out of the fridge and cupboard that needed to be eaten, along with browning up some hamburger with onion and salt & pepper, although chicken or pork or no meat would work just as well, and set it all on the table.

I know the table looks crazy!
We then all sat down at put together whatever looked like a yummy combination.  Often, one of us would come up with a good idea and we would all copy.  It was such a fun, quick, and easy meal, and now my fridge is cleaned out.

Basically just put the ingredients in the middle of the lettuce and roll it up and enjoy

Here are a few of our favorites: (Printer Friendly Recipe)


Mexican Wrap
hamburger
cheese
onions
tomatoes
fritos
corn
taco sauce
sour cream

Asian Wrap
hamburger
onion
red pepper
cabbage
rice
soy sauce
chinese noodles (I realize they aren't GF but this was my plate, and I added them)
 
Pizza Wrap
Turkey Pepperoni
hamburger
Mozarella cheese

 Veggie Wrap
Tomatoes
cabbage
Onion
Corn
Red Peppers

Spicy BBQ
Hamburger
Mozzarella Cheese
Corn
Fritos
A1 Sauce
Green Taco Sauce


Coconut Shrimp
Coconut
Cooked Shrimp
I must admit this wasn't my favorite, I think I would have enjoyed it a lot more if I had had Cocktail Sauce -- Next Time

So next time you have lots of leftovers grab some lettuce and get wrapping!

Monday, October 18, 2010

Bacon Wrapped Chicken with Tomato and Onion Salad

Okay, I know your mouth is watering.  I know mine is just from seeing the picture.  You really should make this, especially since you can actually find yummy tomatoes right now -- Mine are from my garden, oh, how I love my garden (My husband's more precisely since I don't do much, but prepare food from it, but marriage is about sharing so it is mine - right).  Make this -- TONIGHT.  It is so easy it is almost scary.  The recipe is from Rachel Ray's "Chicken Clubs" in her 30 Minute Meals cookbook and when I found it I didn't have bacon and I was so disappointed the rest of the night that the minute I got bacon it was the first thing I made for dinner.  It is meant to be a sandwich, which is how about 1/2 my family ate it as, but my daughter just wanted it without bread so it is easily eaten wrapped in lettuce.

Bacon Wrapped Chicken with Tomato Salad (printer friendly recipe)
8 slices bacon
4 pieces boneless, skinless chicken breasts (I used 1/2 breasts)
4 toothpicks
Tomato & Onion Salad (recipe below)
Romain or Bibb lettuce
Toasted buns, or toasted bread


Pound the breasts so they are uniform thickness.  Criss Cross two pieces of bacon and place the chicken in the middle and wrap the bacon around it (like you do a ribbon on a present) Secure with a tooth pick.  Heat either a griddle to medium high or an outdoor grill  to medium or medium low and cook chicken for about 6-7 minutes on each side until the bacon is crisp and the chicken is cooked through.  While the chicken cooks make the Tomato and Onion Salad.  When the chicken is cooked make a sandwich with the chicken and salad, wrap it in a lettuce leaf, or just sprinkle the salad over the top of the chicken and enjoy.

Tomato & Onion Salad
3 tomatoes, thinly sliced into rings
1/4 medium onion, minced
handful of chopped, fresh parsley or 1 tsp of dried
1/2 tsp dried chervil (opt. but yummy)
Salt & pepper to taste
About 1 T olive oil

1. Mix all ingredients together and let sit until chicken is done.

Friday, June 25, 2010

Mandarin Salad with Sweet and Sour Dressing


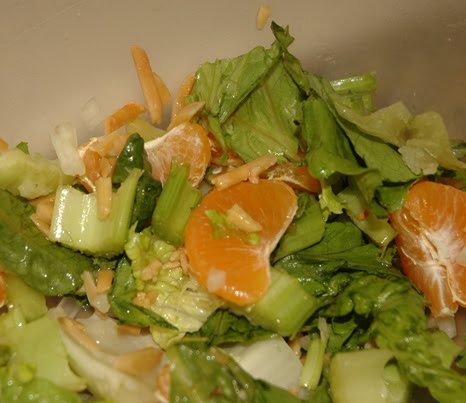
I love this salad, it is so quick and easy and delicious!  To make it a Main Dish you can add diced chicken.

Mandarin Salad with Sweet and Sour Dressing
      (printer friendly recipe)
1/4 C sliced or slivered almonds
1 T plus 1 tsp sugar
1/2 small head lettuce (I used green leaf), torn into bite-sized pieces
1/2 bunch romaine, torn into bite-sized pieces
2 medium stalks, celery, chopped (1 C)
2 medium green onions, thinly sliced or chopped sweet onion (2 T)
1 can mandarin oranges, drained or 4 mandarin oranges peeled and separated.
1 C diced cooked chicken, (opt)
Sweet and Sour Dressing (below)

1. In a small skillet on low heat add the sugar and almonds.

Stir constantly until the sugar melts

and the almonds are coated.

Break apart and set on a small plate and allow to cook completely.
2. Toss the lettuces, celery, onions, oranges, and chicken (if using).  
3. Make dressing.  1x's the dressing if you are going to pour over the whole salad.  2x's the dressing if you will serve it on the side.  Pour the dressing on right before serving.

Sweet and Sour Dressing
1/4 C canola oil
2 T sugar
2 T white vinegar
1 T chopped fresh parsley or 1 tsp dried
1/2 tsp salt
Dash of pepper
Dash of red pepper sauce.

1. Pour ingredints into a container that will close tightly.
 I have this salad dressing maker from Pampered Chef that I LOVE, LOVE, LOVE.  It has measurements on the side so I can just use those.  Doesn't the vinegar and oil look fabulous?

Shake all ingredients together and refrigerate until it is time to serve.

Friday, April 16, 2010

Tin Foil Dinners A La Casserole Style

One of my favorite parts of camping is tin foil dinners (also called Hobo dinners).  Basically you put meat, potatoes,carrots and onions inside heavy duty tin foil and cook it on the coals of the fire.  DELICIOUS!  While this isn't quite the same (how can you compete with the fire cooked taste) it is pretty delicious, insanely easy, naturally GF and everyone in my family LOVES it!  Now that I think about it, why don't I make this every night?  I know the measurements are so incredibly exact, but that is why it is easy.  The butter was a new addition thanks to the idea from Pioneer Woman's Potato Bundles.  Which, if you haven't tried, DO, tomorrow, after you make this today.

Tin Foil Dinners A La Casserole Style (printer friendly version)
Hamburger (1/8-1/4 lb per person)
Onion (your choice, I did 1 small for 5/6 people)
Potatoes (1 per person)
Carrots (1 per person)
Salt and Pepper to taste
Fresh Rosemary (opt)
Butter (opt - I did 2 T for 5/6 people)

1. Preheat oven to 375-degrees.  Grease a casserole dish (choose a size based on your family's size).
2. Mold the hamburger into patties, 1 per person  (or more if you want).  Lay the patties on the bottom of the casserole dish.  Slice 1/2 the onion and sprinkle over the meat.  Salt and pepper to taste.
3. Next slice the potatoes, about 1/4"
I had to show you my Idaho potatoes.  With these you only need 1 for every 2 people, I have some that are 1 for every 3 people. It is hard to find these in the store, they are for restaurants, chips, french fries, etc.  I love being from Idaho.
Layer potatoes over the meat

4. Next, peel and slice the carrots.  Don't slice too thin or they will burn.  No smaller than about 3/8" Then layer on top of potatoes along with slicing the remaining onion and layering it and, if using, cut the butter in pieces and spread over the casserole.  Sprinkle with salt and pepper.
5. If desired, lay a few sprigs of rosemary over the top
I so wish this was from MY herb garden.  But alas, that is in Utah.  I now need to grow one here in New Mexico.
6. Bake for 1 hour.  When done remove rosemary sprigs and serve.

We have a variety of ways of  eating this.  There is the basic

Then there is the ketchuped

My way is with ketchup and mustard on the meat and the veggies plain.  My daughter dips everything in ketchup.  And my baby . . .
He likes his purred with a little ketchup.

FYI: Occasionally you get a potato with a brown spot in the middle
this is called "hollow heart."  Just cut it out and throw it away and enjoy the potato.  It will be delicious.

Wednesday, March 31, 2010

Seasoned Refried Beans

How to go from this:

to this:

My church (The Church of Jesus Christ of Latter-Day Saints, ie. the Mormons) has a variety of food cannerys throughout the US and the world.  They help in my church's worldwide humanitarian aid, along with allowing others the opportunity to package their own food.  I order a lot of bulk food there.  The one rule, you have to package some either in #10 cans or plastic pouches and then you can buy as much of what they have on hand.  Considering we eat a lot of refried beans, when I saw dried I thought it was worth a try, and we haven't gone back.  The ingredients are just pinto beans and salt that has been mashed and then dried.  You just have to add equal amounts of boiling water and beans and let it sit for 10 minutes.  You can alter this ratio depending on how thick or thin you want the beans.  The best part is that you can add seasoning to the beans and this is the part we love.

Here is how I make them.  I imagine you could do this with any dried refried beans, I just don't know where you would get them.

Seasoned Refried Beans (printer friendly)
1 C water*
1/2 T chili powder
1-2 tsp cumin
2 tsp dried cilantro
1/4 tsp dried oregano
1 C dried beans*

1. In a small saucepan combine water, and seasonings.  Bring to a boil.  Add beans.  Cover and let sit for 10 minutes.  Stir. Note: This makes a runnier consistency so if you prefer thicker reduce the water.

*Or whichever ratio your dried beans use.

Thursday, January 7, 2010

Doughnut Balls

For my daughter's class Christmas party they were serving doughnuts.  She really wanted some, but I wasn't up for rolling out and the raising, etc.  But I remembered this recipe in my Lion House Desserts cookbook that I quickly checked just to see what it was.  Come to find out it was a dump, stir, fry recipe which was up to my cooking level for the day.  I was quickly just raised the baking powder a little and added some xanthan gum and voile, we had GF Doughnut Balls that were delicious!  In fact they turned out so good we decided to change our Christmas breakfast tradition to Doughnut Balls.

Doughnut Balls (printer friendly recipe)
2 C rice flour mix
1/2 C sorghum flour*
1 1/2 tsp baking powder
1/2 t xanthan gum
2-2 1/2 eggs**(or substitute)
1 1/2 C sour cream (or substitute, Tofutti makes a good one)
2 T sugar
1 tsp vanilla
1/4 tsp salt
1 1/4 C vegetable oil for deep frying***
Powdered sugar
Cinnamon Sugar (recipe below)
Chocolate Glaze (recipe below)
Vanilla Glaze (recipe below)

1. In a large bowl combine rice flour mix, sorghum flour, baking powder, xanthan  gum, eggs, sour cream, sugar, vanilla, and salt -- The batter will be soft, like a thick muffin batter.
2. Heat oil to about 350-degrees.
3. Place tablespoons of dough
I used my cookie scoop, it made it really easy.

into the fryer
Drop carefully so you don't splash oil on yourself.

Fry about 3-4 at a time
I love this photo, I think it is so pretty.

Fry doughnuts for about 3-5 minutes or until golden brown all around.  Remove from pan/fryer with a slotted spoon or basket.  Drain on paper towels.
Don't they look yummy already?

Toss with powdered sugar in a ziploc bag

or toss with cinnamon sugar

or drizzle with glaze.

Anyway you eat them -- plain, sugared or glazed -- they are de-li-cious!

 
*Or just 2 1/2 C rice flour mix-- if you don't want GF just use regular flour and omit xanthan gum.
**to do a 1/2 an egg I scramble and egg and dump approx 1/2 in the recipe.
***or if you have a deep fryer use its directions

Cinnamon Sugar
1 C sugar
1 T ground cinnamon

1. Stir together until fully combined.

Vanilla Glaze
(also from the Lion House Desserts cookbook)
1 C powdered sugar
2-3 T milk or cream
1 tsp vanilla

1. Combine the powdered sugar with enough milk to make the mixture slightly runny.  Stir in vanilla.

Chocolate Glaze
(adapted from TheUltimate Southern Living Cookbook)
1 T butter
3 T cocoa
1 C powdered sugar (sifted if you want, I never do)
1 1/2-3 T boiling water
1 tsp vanilla

1. In a small heavy saucepan, combine the butter and cocoa.  Cook over low heat until the butter melts and the cocoa is fully incorporated.  Cool for 3-4 minutes.  Add sugar and combine together.  Add water until it reaches a slightly runny consistency.  Add vanilla.

LinkWithin

Related Posts with Thumbnails