Showing posts with label Dairy Free. Show all posts

Monday, January 31, 2011

Crockpot Roast with Potatoes

Last year for Mother's Day my sister was asked to speak in church on what she had learned from our mother.  My sister is a wonderful writer and has a real talent for putting her thoughts into words.  I have always admired this about her.  Anyway, the way she wrote the talk was to talk about how my mother did not necessarily preach to us, but through everyday things she taught us about life and about the importance of faith.  One of those everyday things she used as an example is making a roast.  The first step to a good roast is to heat a skillet as hot as possible and brown the roast on all sides until it is ALMOST burned.  You don't have to do it, but the roast will taste so much better if you do.  She compared this to life.  How often we have to be "burned" to learn the lessons we need to learn and to have the greatest "flavor" and wisdom.  Ever since my mother told me about the talk I can not cook a roast without being reminded of this great lesson in life.  So I am passing it on to you.

Crockpot Roast with Potatoes (printer friendly)
3-4 lb roast
1 onion sliced
 salt & pepper to taste
1/4 tsp garlic powder
1 tsp dried thyme
1/2 C beef broth
4 med-large potatoes, cut into large pieces

1. Heat a large skillet over high heat.  Using tongs brown the roast on all sides until dark golden brown (almost burnt)
Looks good already doesn't it.

Even better

2. Slice the onion.  Place 1/2 the slices on the bottom of your crockpot.


3.  Add the seared roast and sprinkle with seasonings.

4. Add potatoes and remaining onions and pour over the broth.

 
5. Cover the crockpot and cook on low 6-8 hours or high 3-4.
6. Next remove the roast from the crockpot (leave the potatoes in to stay warm until you are ready to serve them)  to a plate and pour some of the remaining sauce over the roast and allow to sit for at least 10-15 minutes.  I always worried about this because I HATE cold food, but it really makes a difference.  The roast has a chance to cool enough to hold the moisture in, instead of it all escaping as steam when you cut it.  When you serve it, pour some more of the remaining broth over it and enjoy!

Monday, January 24, 2011

Tuna Patties

I made these several months ago and our whole family loved them.  They are really simple, and a great pantry food.  For GF bread crumbs I strongly recommend processing Rice Chex.  They are relatively cheap and don't have much flavor so just the flavor of the food comes through.

Tuna Patties (printer friendly)
3 (6 oz) cans of tuna, drained & flaked* 
3 eggs
1 1/2 tsp mustard

3 T onion, minced
1 clove of garlic, minced
1 tsp pepper
1/8 tsp dill
3/4 C bread crumbs
3 T veg oil

1. In a medium bowl combine the tuna, eggs, mustardm onion, garlic, pepper, and dill.


Mix until combined.  Then add the bread crumbs.


Mix with your hands until the mixture is the consistency of cookie dough.

2. Shape into 6 patties.
3. Heat a large skillet over medium heat.  Add the oil and swirl around.  Add the patties.  Cook on both sides until lightly brown.
4. Serve as a a sandwich with pickles, mayo, lettuce, etc.  Or just eat plain.  We had ours with sweet potato fries.  YUM!

Monday, January 17, 2011

Snow Cone Syrup


Last month I taught preschool as a part of a preschool with a group of mom's.  Our topic was snow and for our treat we had snowcones.  I got a snowcone maker a few years ago and have had a lot of fun with it.  But this was my first attempt at making my own syrup.  I made the syrup the way I make my maple syrup and it turned out too thick.  That said it was delicious.  Here is the recipe with a thinner syrup.

Snow Cones (printer friendly)
2 C water
2 C sugar
Candy flavoring

1. In a saucepan combine the water and sugar.  Bring to a boil and allow to boil for 1 minute.  Remove from stove.


You can flavor the whole batch or separate into different bowls for flavoring.  Add about 1/8 tsp flavoring to each bowl.  Taste and add more flavoring as needed.  Color with food coloring if desired
I made, pina colada, lemon, and raspberry.

Monday, January 10, 2011

Mexican Rice


 I'm sure I have mentioned this before, but I love Mexican food. I love the cheese, I love the spice (just not too spicy, I still want to taste my food), I love the sauces, I love salsa, I love the corn tortillas, I love the beans, I love the corn, . . . Need I go on.  Anyway, the other day I made fajitas and thought how if we were at a restaurant they would serve these with rice and beans.  So I went looking for a good Mexican rice recipe and found one in my trusty The America's Test Kitchen Family Cookbook.  With a little adapting for spiciness and lack of a few ingredients it got made and was delicious!

Mexican Rice (printer friendly)
1 can of tomatoes
1 small onion, pealed, trimmed & quartered
1/3 C vegetable oil
2 C long grain rice
4 garlic cloves, minced
1 can diced jalepenos
2 C chicken broth
1 T tomato paste
1 1/2 t salt
2 1/2 T dried cilantro or 1/2 C fresh
Pepper
Lime juice

1. Preheat oven to 350 degrees and place the rack in the middle.  Puree the tomatoes and onion in the food processor. There should be 2 Cups of puree. Remove any excess so there is only 2 C.
I made A LOT of this since I wanted to freeze it for later.  So you would have a lot less than this for this recipe.

2.Heat the oil on med. heat in an oven proof dutch oven or pot.  Add the rice and saute until light golden brown.  This should take approx 10 minutes (lots more if you are quadrupling it like I did).  Make sure to stir often so the rice doesn't burn.


3.  Stir in the garlic and the can of jalepenos.  Cook until it smells like garlic & jalepenos (about 15 seconds).  Add the pureed tomatoes/onion mixture, broth, tomato paste, salt and cilantro (if using dried). 

Bring to a boil and then cover and bake for about 30-35 minutes or until all the liquid is dissolved and the rice is fully cooked. Be sure to stir after 15 minutes.
4.  Fluff with a fork and add cilantro (if fresh) and add some fresh jalepenos, if desired.

Thursday, January 6, 2011

Chicken Fajitas


We love fajitas.  I use to use mixes, but of course, with the whole GF thing that is less of an option.  I know there are GF mixes, but I must admilt I have come to enjoy making my own.  I use a recipe from The America's Test Kitchen Family Cookbook which is one of my many cookbooks I LOVE.

Chicken Fajitas (printer friendly)
2 chicken breast halves, sliced about a 1/2 inch
2 T Veg Oil
2 T lime juice
salt & pepper to taste
1 med onion, sliced thin
1 green pepper, sliced thin*
1 red pepper, sliced thin*
1 tsp chili powder
1 tsp cumin
2-4 tsp water
Corn Tortillas
Sour Cream (opt)
Guacamole (opt)
Cheese (opt)

1. Heat a large skillet on med-high heat.  Add 1 T oil and swirl around pan.  Add chicken and salt & pepper.  Saute until cooked through and browned.  Remove to a bowl and add lime juice.  Toss to thoroughly coat.

2. In the skillet, add the remaining oil and add the onions and peppers, along with the chili powder and cumin along with salt and pepper to taste.  Saute until the onions are soft and translucent.  Add water as needed so they don't burn.

3. Add chicken and stir until it all combined and the seasoning is evenly distributed.
4. Serve on tortillas with sour cream, guacamole and cheese and any other toppings you desire.

Sunday, November 7, 2010

Johnnycakes


For our kids birthdays we always get them a book.  This year for my son, who is just starting chapter books, I found these Magic Tree House-like books called The Enchanted Tunnel series.  It is an LDS (Mormon) series and the first book finds the brother and sister arriving on a pioneer trek.  My son has LOVED this book.  For him, one of the best parts is a recipe for "Johnnycakes."  Pioneers often cooked these in the morning and then they would wrap them up in a handkerchief and put them in their pockets where they would stay warm.  While not especially hygienic, they were practical for "fast food" on the long walk West.  Since my son started the book the number of times he asked for me to make these is incalculable.  Finally, I relented, and it was one of the best decisions I made.

Basically, they are a cross between a Southern cornbread and a pancake.  The first time we ate them we treated them like a pancake with butter and syrup.  This time thought I thought we would branch out and offer pancake toppings and taco toppings, kind of a Navajo Taco without fry bread.  Both ways are delicious. I then sent them as the bread for a sandwich the next day.  I also think they would be great served plain, perhaps as a side in a meal. 

Johnnycakes (printer friendly)
1 1/4 C flour mix
3/4 C cornmeal
1/2 tsp salt
2 tsp baking powder
1/2 t xanthan gum
1 egg beaten
1 C milk (whatever kind you have)
1/4 C melted butter (or oil)

1. In a medium mixing bowl, combine the flour, cornmeal, salt, baking powder, and xanthan gum.  In a separate bowl combine the egg, milk and melted butter.  Add the egg mixture to the dry mixture and mix just until combined.
2.  Cook one of the following ways:
--Pour into a greased 9x13 pan and bake on 400-degrees for 30 minutes
--Heat a greased skillet (or griddle) on medium-high heat and pour 1/4 C batter for each "cake."    Turn when the top looks bubbly.

Here are photos of two of our favorite ways to eat them.
 Main Course

Dessert

Monday, October 25, 2010

Choose Your Own Lettuce Wraps

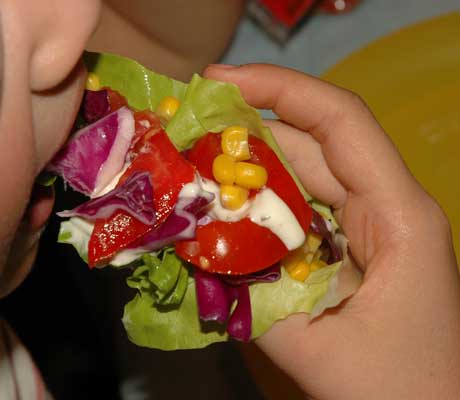
A while ago I was planning on making chicken tacos and got them almost made only to realize I didn't have tortillas or chips.  Needless to say, I was annoyed.  After searching the fridge, freezer and cupboards I found some Romain lettuce and decided to just use the lettuce as the "tortilla."  They were wonderful, and I felt so healthy.  That said, I have found that butter lettuce works a lot better, but Romain works in a pinch.  The other night I decide to do a "clean out the fridge" and do lettuce wraps.  It turned out wonderfully.  I basically took anything and everything out of the fridge and cupboard that needed to be eaten, along with browning up some hamburger with onion and salt & pepper, although chicken or pork or no meat would work just as well, and set it all on the table.

I know the table looks crazy!
We then all sat down at put together whatever looked like a yummy combination.  Often, one of us would come up with a good idea and we would all copy.  It was such a fun, quick, and easy meal, and now my fridge is cleaned out.

Basically just put the ingredients in the middle of the lettuce and roll it up and enjoy

Here are a few of our favorites: (Printer Friendly Recipe)


Mexican Wrap
hamburger
cheese
onions
tomatoes
fritos
corn
taco sauce
sour cream

Asian Wrap
hamburger
onion
red pepper
cabbage
rice
soy sauce
chinese noodles (I realize they aren't GF but this was my plate, and I added them)
 
Pizza Wrap
Turkey Pepperoni
hamburger
Mozarella cheese

 Veggie Wrap
Tomatoes
cabbage
Onion
Corn
Red Peppers

Spicy BBQ
Hamburger
Mozzarella Cheese
Corn
Fritos
A1 Sauce
Green Taco Sauce


Coconut Shrimp
Coconut
Cooked Shrimp
I must admit this wasn't my favorite, I think I would have enjoyed it a lot more if I had had Cocktail Sauce -- Next Time

So next time you have lots of leftovers grab some lettuce and get wrapping!

Monday, October 18, 2010

Bacon Wrapped Chicken with Tomato and Onion Salad

Okay, I know your mouth is watering.  I know mine is just from seeing the picture.  You really should make this, especially since you can actually find yummy tomatoes right now -- Mine are from my garden, oh, how I love my garden (My husband's more precisely since I don't do much, but prepare food from it, but marriage is about sharing so it is mine - right).  Make this -- TONIGHT.  It is so easy it is almost scary.  The recipe is from Rachel Ray's "Chicken Clubs" in her 30 Minute Meals cookbook and when I found it I didn't have bacon and I was so disappointed the rest of the night that the minute I got bacon it was the first thing I made for dinner.  It is meant to be a sandwich, which is how about 1/2 my family ate it as, but my daughter just wanted it without bread so it is easily eaten wrapped in lettuce.

Bacon Wrapped Chicken with Tomato Salad (printer friendly recipe)
8 slices bacon
4 pieces boneless, skinless chicken breasts (I used 1/2 breasts)
4 toothpicks
Tomato & Onion Salad (recipe below)
Romain or Bibb lettuce
Toasted buns, or toasted bread


Pound the breasts so they are uniform thickness.  Criss Cross two pieces of bacon and place the chicken in the middle and wrap the bacon around it (like you do a ribbon on a present) Secure with a tooth pick.  Heat either a griddle to medium high or an outdoor grill  to medium or medium low and cook chicken for about 6-7 minutes on each side until the bacon is crisp and the chicken is cooked through.  While the chicken cooks make the Tomato and Onion Salad.  When the chicken is cooked make a sandwich with the chicken and salad, wrap it in a lettuce leaf, or just sprinkle the salad over the top of the chicken and enjoy.

Tomato & Onion Salad
3 tomatoes, thinly sliced into rings
1/4 medium onion, minced
handful of chopped, fresh parsley or 1 tsp of dried
1/2 tsp dried chervil (opt. but yummy)
Salt & pepper to taste
About 1 T olive oil

1. Mix all ingredients together and let sit until chicken is done.

Monday, October 11, 2010

Sweet & Sour Meatballs


I posted last week a recipe for meatballs.  Here is one way to use them that we LOVE!!!

Sweet & Sour Meatballs (printer friendly recipe)
1 C sugar (brown or white, your preference)
2 Tbsp Corn Starch
1/2 C Ketchup
1 20 oz can pineapple tidbits, including juice
Approx 20 Meatballs
Rice or noodles

In a medium saucepan combine ingredients and about 20 meatballs over med heat.  Bring to a simmer and simmer for 20 minutes.  Serve over rice or noodles.  Makes enough for 6 people.

Thursday, October 7, 2010

Sauteed Veggies

The other night I was trying to figure out what to cook.  I wasn't really in the mood to cook and since it was the end of the month we were low on supplies and I was trying to be good and not buy anything.  So after rumaging through my fridge I found 3 large baked potatoes from a previous dinner in the fridge and decided to add some other veggies to them and fry them up with a little seasoning.  It was delicious.   I was afraid I would miss the hamburger which is something I often fry with leftover baked potatoes, but I didn't.  I think we will be eating this more often.

Sauteed Veggies (printer friendly version)
1 T bacon grease (optional, but adds a great flavor you could just sub butter)
1 T butter
4 carrots, sliced
3 slices of onions cut into 6ths (see photo below)
1/2 green pepper, chopped
2 large or 3-4 small/med baked potatoes
salt & pepper to taste
1/2 tsp garlic salt
1/4 tsp smoked paprika
1/8 tsp cumin

1. In a large fry pan or skillet melt bacon grease and butter.  Add carrots and sautee for about 5 minutes.
Add onion
 one slice cut into sixths

and green pepper and cook until onion is soft.  Add potatoes
 
and seasonings.

Cook until all heated through and some of the veggies are slightly crispy brown.  Enjoy as the main dish of dinner with bread or as a side.  It would be yummy with meatloaf don't you think.  Hmmmm I think I need to buy some hamburger and make meatloaf now.

Monday, October 4, 2010

Meatballs

This is a recipe we love.  My mom created it and it is delicious.  I have to admit it may not be as moist as some since it doesn't have bread crumbs, but that is why I like it.  It is too much of a pain to come up with good GF breadcrumbs.  You can enjoy these with anything you might put meatballs on.  I will occasionally be posting some recipes that use these.  If you want to use turkey instead of beef I imagine it would work, however you might want to add a little olive oil since turkey can be so lean. If you want to make the meatballs more Italian flavored the adaptation is listed at the end.  I've been thinking of coming up with other flavored meatballs, such as Mexican that you could make a sandwich with or soup etc.  If you have any ideas for other flavored meatballs or recipes to use them in let me know.

Meatballs (printer friendly recipe)
approx 12 per 1/2 lb of meat

1 1/2 lbs ground beef
2 Tbsp minced onion
2 Tbs minced green pepper
1/2 tsp salt
1/4 tsp pepper
Mix ingredients together until mixed well

Mold into small balls about 1" in diameter
Horrid photo I know but you get the idea.  I love Cookie scoops for this!

Place on a greased pan

Bake at 375-degrees for 30 minutes.  Allow to cool and then place in a freezer bag for later use.

Italian Meatballs 
follow the above recipe, but add the following to the ingredients before you mix them together.

1 T dried Italian Seasoning
3 cloves of garlic minced

Monday, September 27, 2010

Biscuits


We love biscuits at our house, as I'm sure you do at yours too.  We had vegetable soup the other night and biscuits were a must.  I really like Carol Fenster's recipe in her Wheat Free Recipes & Menus book. It is just perfect, a few more ingredients than regular baking powder biscuits, but worth it.

Carol Fenster's Biscuits (printer friendly recipe)
1 C rice flour blend
1/2 C cornstarch
1 T sugar
2 tsp baking powder
1 tsp xanthan gum*
1 tsp guar gum*
1/2 tsp salt
1/4 tsp baking soda
1/4 tsp shortening
1/2 C milk (or substitute)
1 egg (or equivalent)
White rice flour, for dusting

1. Preheat oven to 350-degrees (375 works best for me, so see what is best for you) and grease a large cookie sheet.
2. Combine the flour, cornstarch sugar, baking powder, xanthan & guar gum, salt and baking soda in a food processor and pulse a couple times to combine (or place in a large bowl and whisk until combined).  Add shortening and pulse until the mixture as the texture of large bread crumbs (or cut in the shortening until the appropriate texture is reached).
3. Combine milk & egg and add to the flour mixture and process until it forms a ball (or use a fork and stir until the same thing happens).  If for some reason, you don't get a ball, add 1 tbsp of water at a time until it does.  The dough should be soft.
4. Lightly flour the countertop or the cookie sheet or I prefer a rolling mat.

Place dough on surface and turn over so both sides are floured.

Roll or pat the dough to a 3/4" thickness and cut into 2" circles.
I have never had a biscuit cutter, I just use a cup and it works perfectly

Reshape leftover dough and pat again to a 3/4" thickness and cut again, repeat until dough is used.  I usually take the last bits and form into a biscuit.  It is ugly and not as soft, but it still tastes good.
5. Place biscuits on cookie sheet next to each other
You can see my hand formed one on the bottom of the photo.

6. Bake for 10-15 minutes or until lightly brown.  Remove from oven and transfer to a wire rack and allow to cool slightly.  Then enjoy!

Thursday, July 1, 2010

Shepherd's Pie

I know that most people have their version of Shepherd's Pie.  Basically, meat and veggies with some sauce/gravy, covered in mashed potatoes.  My mother's was done using Campbell's Cream of Mushroom soup (I know it is bad for you, but it tastes so good!) for the sauce.  Always Campbell's Cream of Mushroom, all others just tasted wrong!  It is one of my favorite meals and it was an easy meal my kids LOVED.  Then came in came Celiacs and out went casseroles.  For the most part I wasn't a casserole maker to begin with, but I had a few staples and this was one.  As with most starting out with gluten free cooking I shied away from all things that were inherently gluteny (I know it isn't a word, but it works so well).  Eventually, I started experimenting, but this was still a recipe I stayed away from.  How could it possibly be as good.  After a year or so I braved this dish.  At the time my daughter was off dairy and eating soy milk which I couldn't stand (thankfully she liked) so I decided to cook all the components and then right before adding the sauce, I pulled a little bit of the meat and veggie mixture out and added a mushroom white sauce I made from scratch.  Thankfully, she loved it.  I personally find it yummier now that I can use regular milk for the sauce, but I have to admit I still make two dishes and use Campbell's soup for our sauce and a homemade GF sauce for hers.  Not really sure why, I really like the sauce I make for my daughter, I always make extra to use as gravy over some extra mashed potatoes. I think it is, mostly, because for me Shepherd's Pie reminds me of home and of my mom.  It is my ultimate comfort food.  Hopefully, for my daughter this recipe will do the same for her.  This recipe makes about 5-6 servings depending on how much you want.

Shepherd's Pie (printer friendly)
4-5 lg potatoes
milk & butter for mashed potatoes
1 lb hamburger or ground turkey
1 medium onion, diced and divided
1 can sliced mushrooms, drained and reserving the liquid.
1 can green beans, drained
salt and pepper to taste

Mushroom Sauce (recipe below)

1. Cut up the potatoes into about 1/2"-3/4" cubes and boil in salted water until soft, but not mushy.

2. Meanwhile, in an oven proof skillet, brown the meat with the onion, reserving about 1 Tbsp of onion for the sauce.

When the meat is mostly cooked add the mushrooms.

When fully cooked add the green beans and bring to a boil.

Add enough of the sauce to make it really thick, it probably won't take all the sauce.

Cover with mashed potatoes,

leaving a hole down to the sauce to allow the steam to escape and not boil over (or at least not as much).

3. Cook in a 350 degree oven for 30 minutes.  Serve.  YUM!

Mushroom sauce
2 T butter or oil
2 T diced onion
1/2 tsp salt
1/2 tsp pepper
1/4-1/2 tsp garlic powder
1 1/2 T potato flour
Reserved mushroom liquid
Milk (choose your favorite, I prefer soy)
1/2 T Worcestershire sauce
1/2 tsp dried basil

1. In a small pan melt butter.  Saute onions until lightly browned. Add salt, pepper, garlic powder and potato flour.

Stir until lightly brown and somewhat smooth.  It might be a little crumbly

2. Add milk to mushroom liquid to equal 1 C and add Worcestershire sauce and basil.  Pour a little at a time into pan making sure to fully mix in the onion/flour mixture. Bring to a boil and cook until thick.

LinkWithin

Related Posts with Thumbnails